Introduction
That document serves as a detailed guide to customize text and messages that are shown to your end users within the monitoring flow of JAAK KYC Web, the white-branded solution of JAAK.
The customization allows you to align the tone of communication with your brand and to ensure that text meets your legal and business requirements. JAAK.
Scope: This guide applying * only * to the solution JAAK KYC Web (branded).
Access to Content Templates
To modify interface text, the first step is to navigate to the right section inside the platform.
- Retiring at Platform JAAK with your credentials.
- On the main navigation menu, click the Section of "KYC".
- At KYCselect the option "Template".
From this Section, you can manage and edit different content templates that make up the check flow. The process is divided into four main steps.
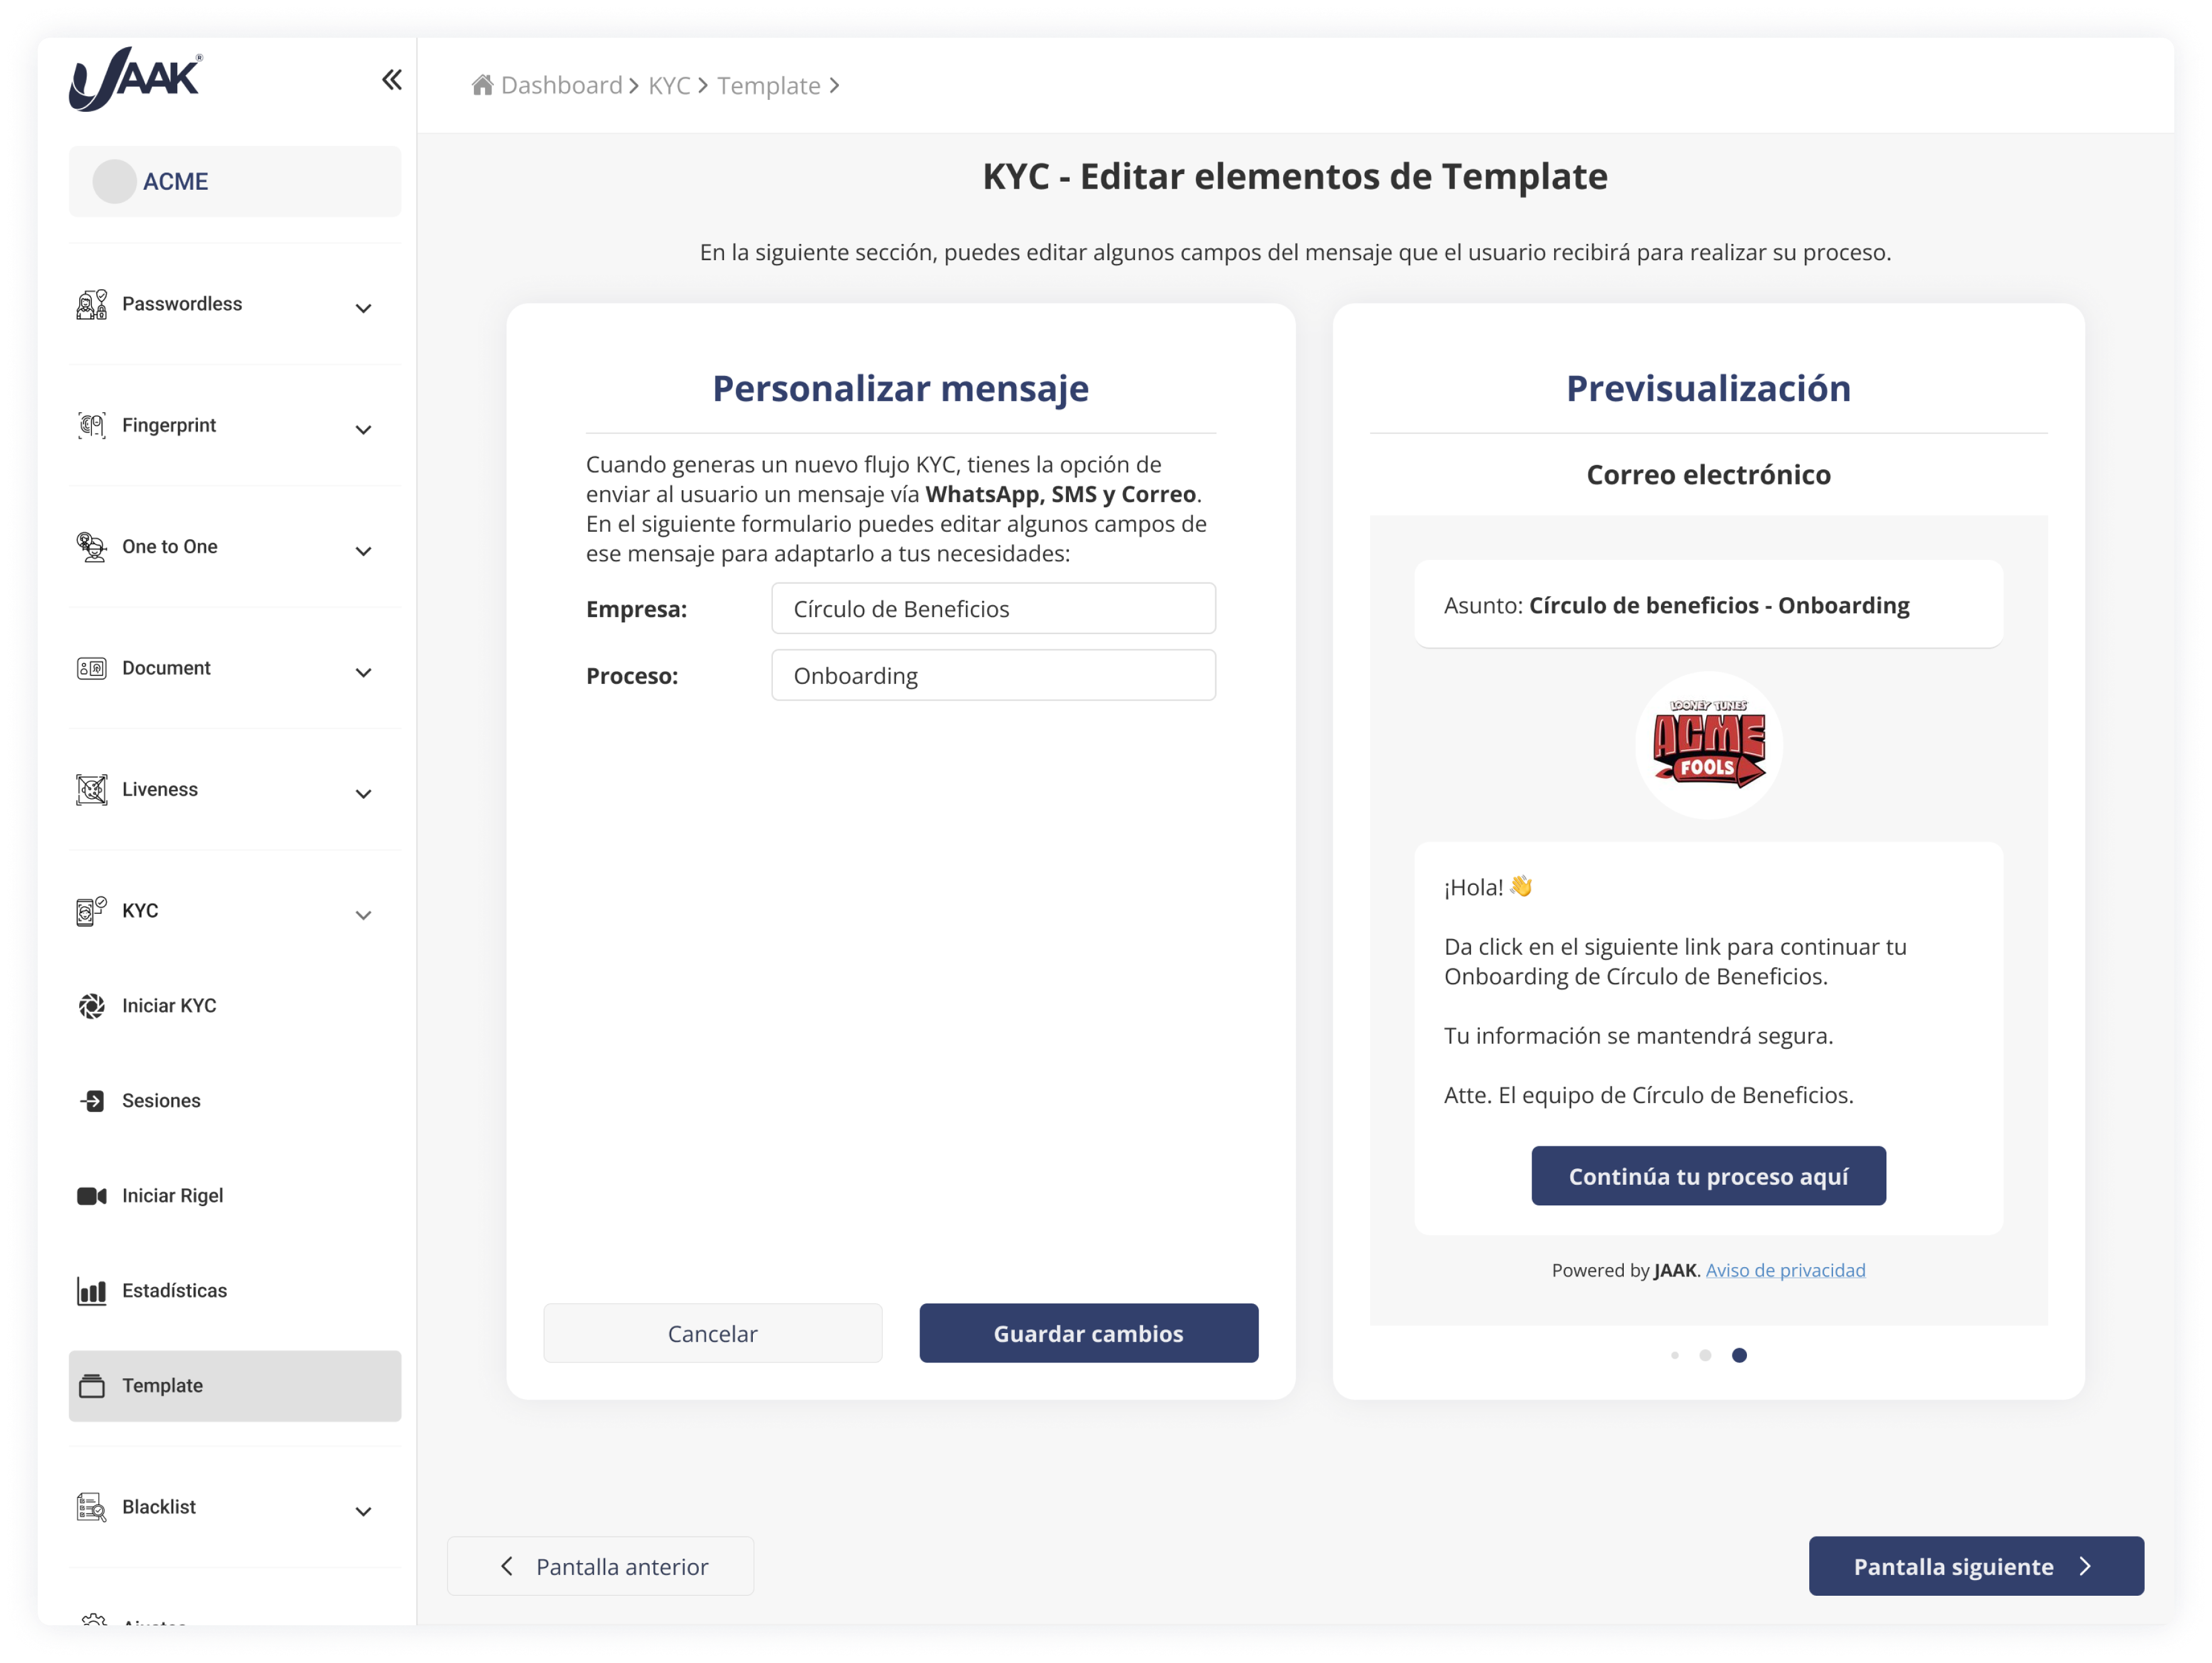
Step 1. Customize SMS / WhatsApp / Email message
This screen allows you to edit the SMS / WhatsApp / Email message fields that users will get to start their process KYC.
- Issuing fields:
- Company: You can edit the name of the company that will be shown in the message.
- Process: Allows to change the name of the process or flow.
- Previewing: To the right, you will see a simulation of how the WhatsApp message will light, enabling you to review the changes before saving them.
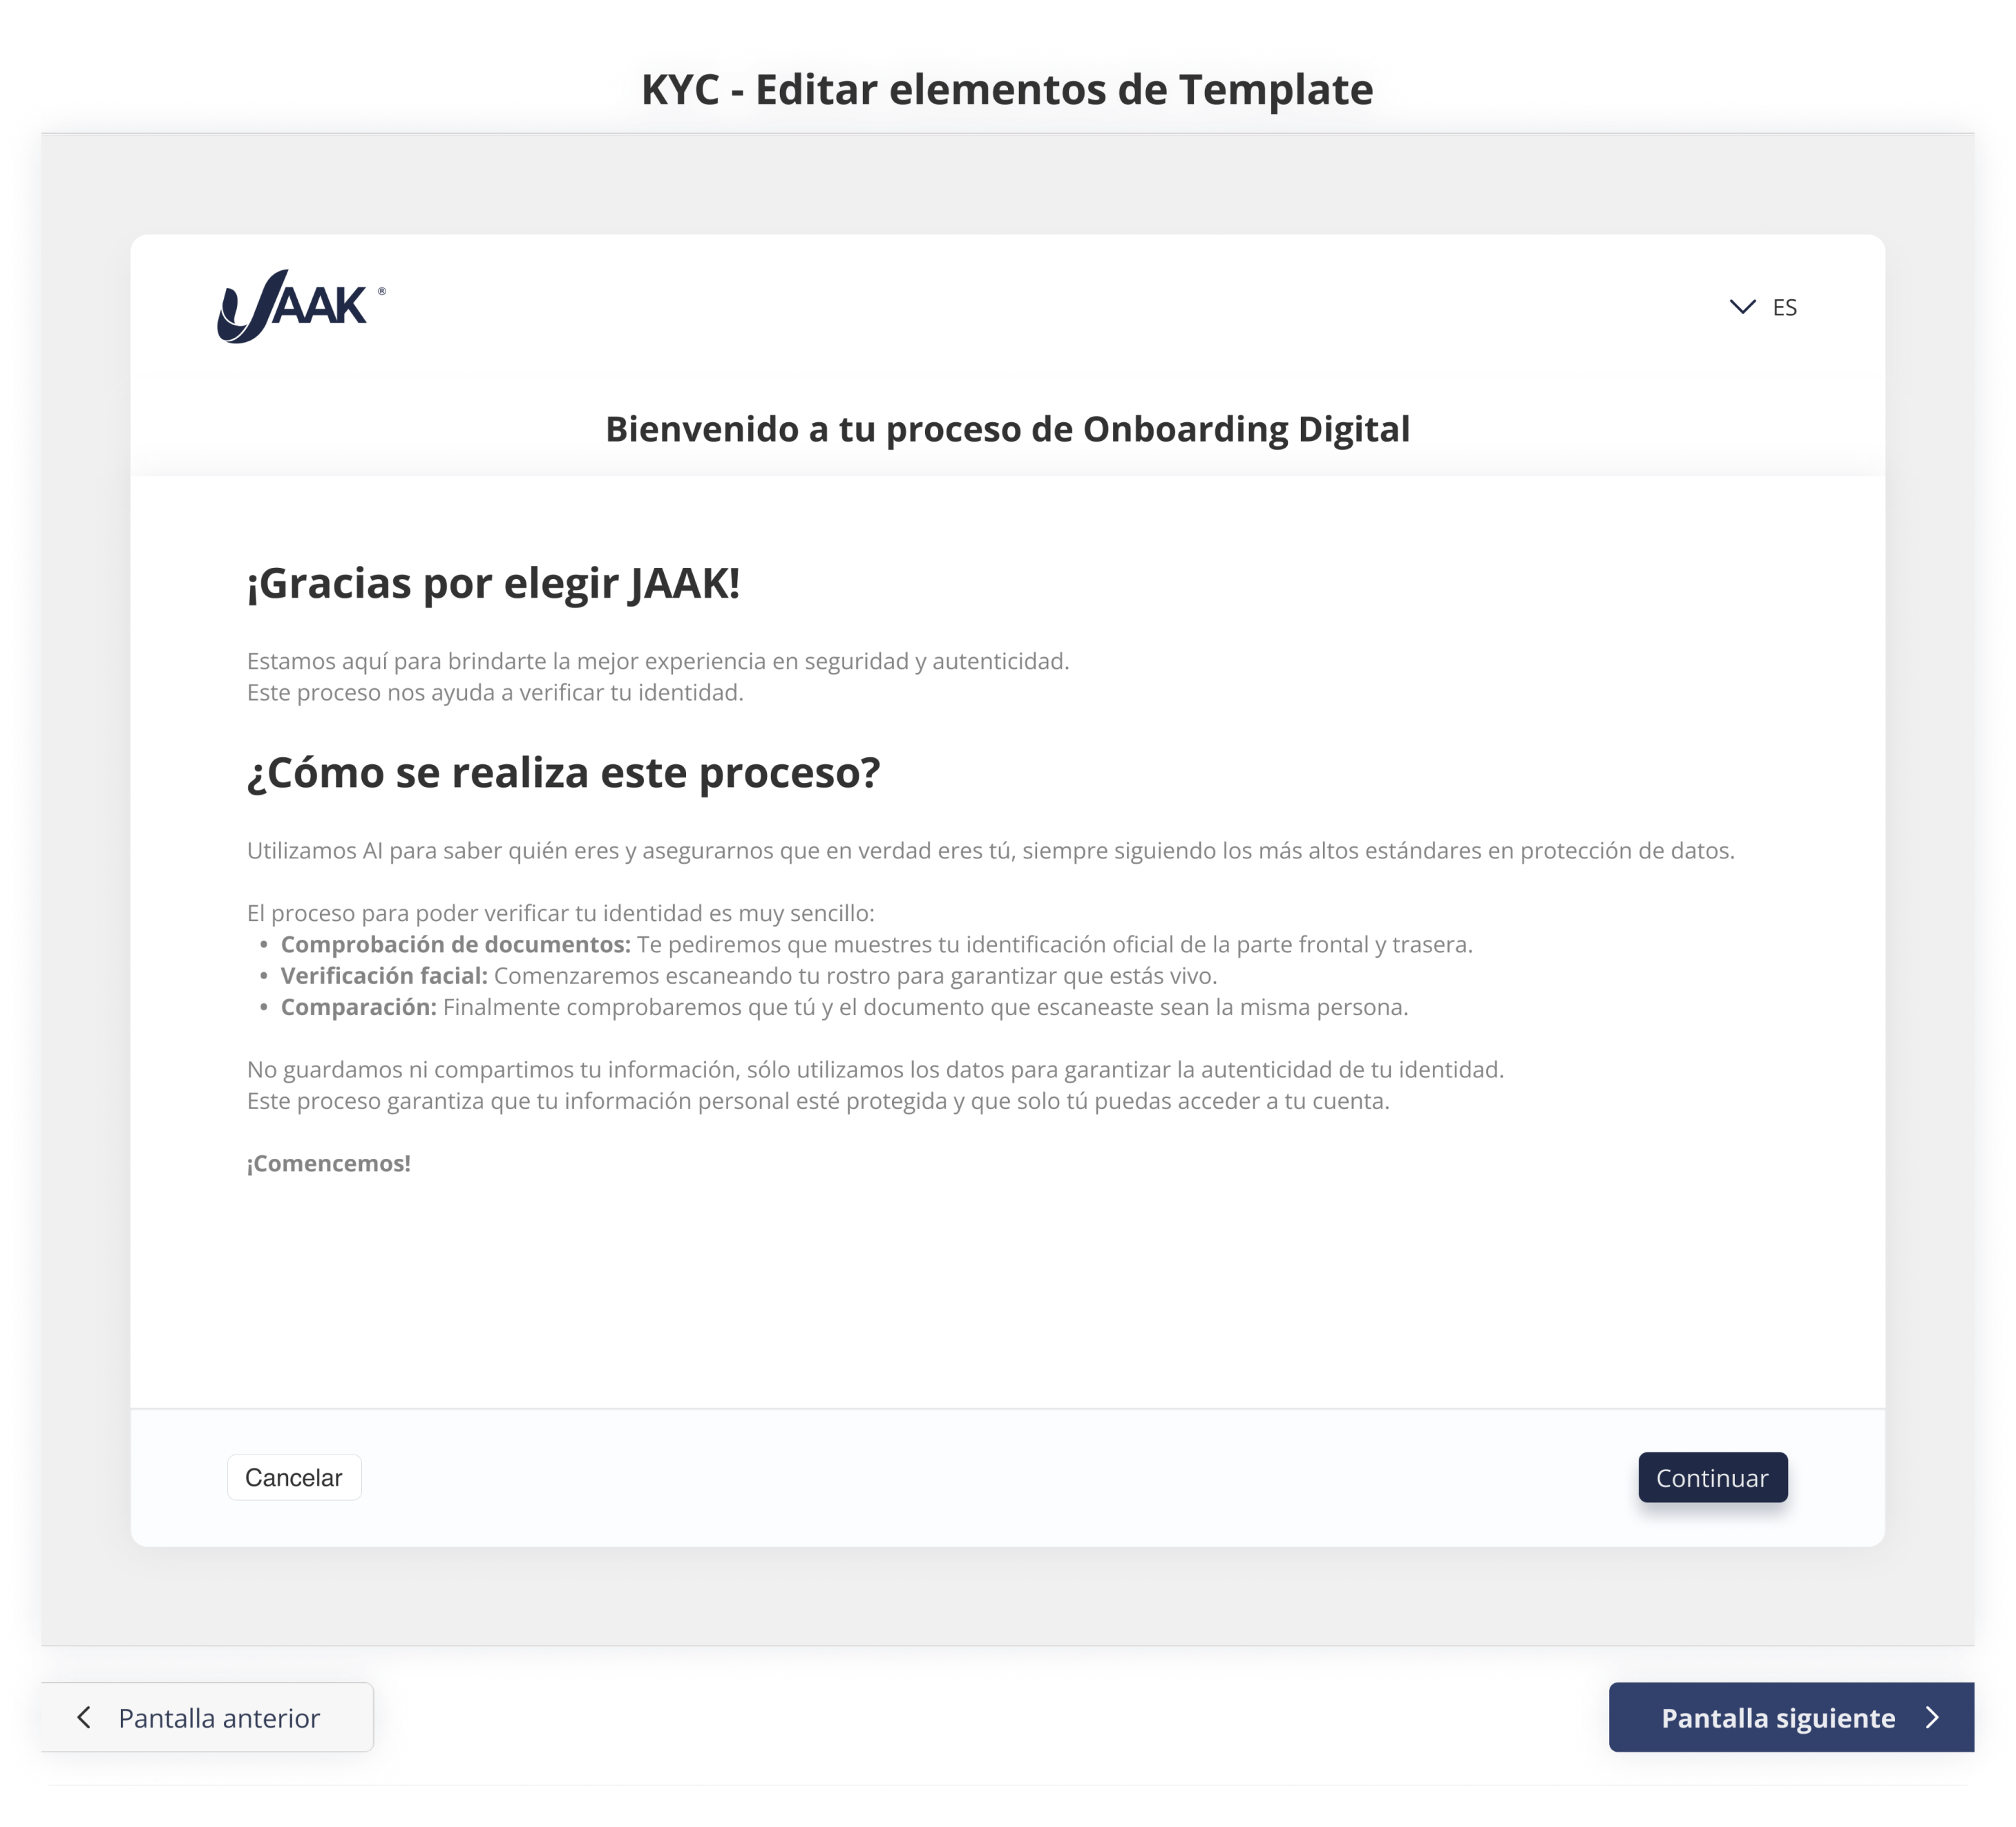
2. Personalization of the Onboarding Display
That's the welcome screen the user sees as they start the check flow. The editable fields are marked with a pencil icon.
- Issuing fields:
- Welcome title: You can modify the main text of welcome, as "Welcome to your QA TEST Digital Onboarding process."
- Welcome and Indications message: It allows to edit the text body where initial indications are given to the user.
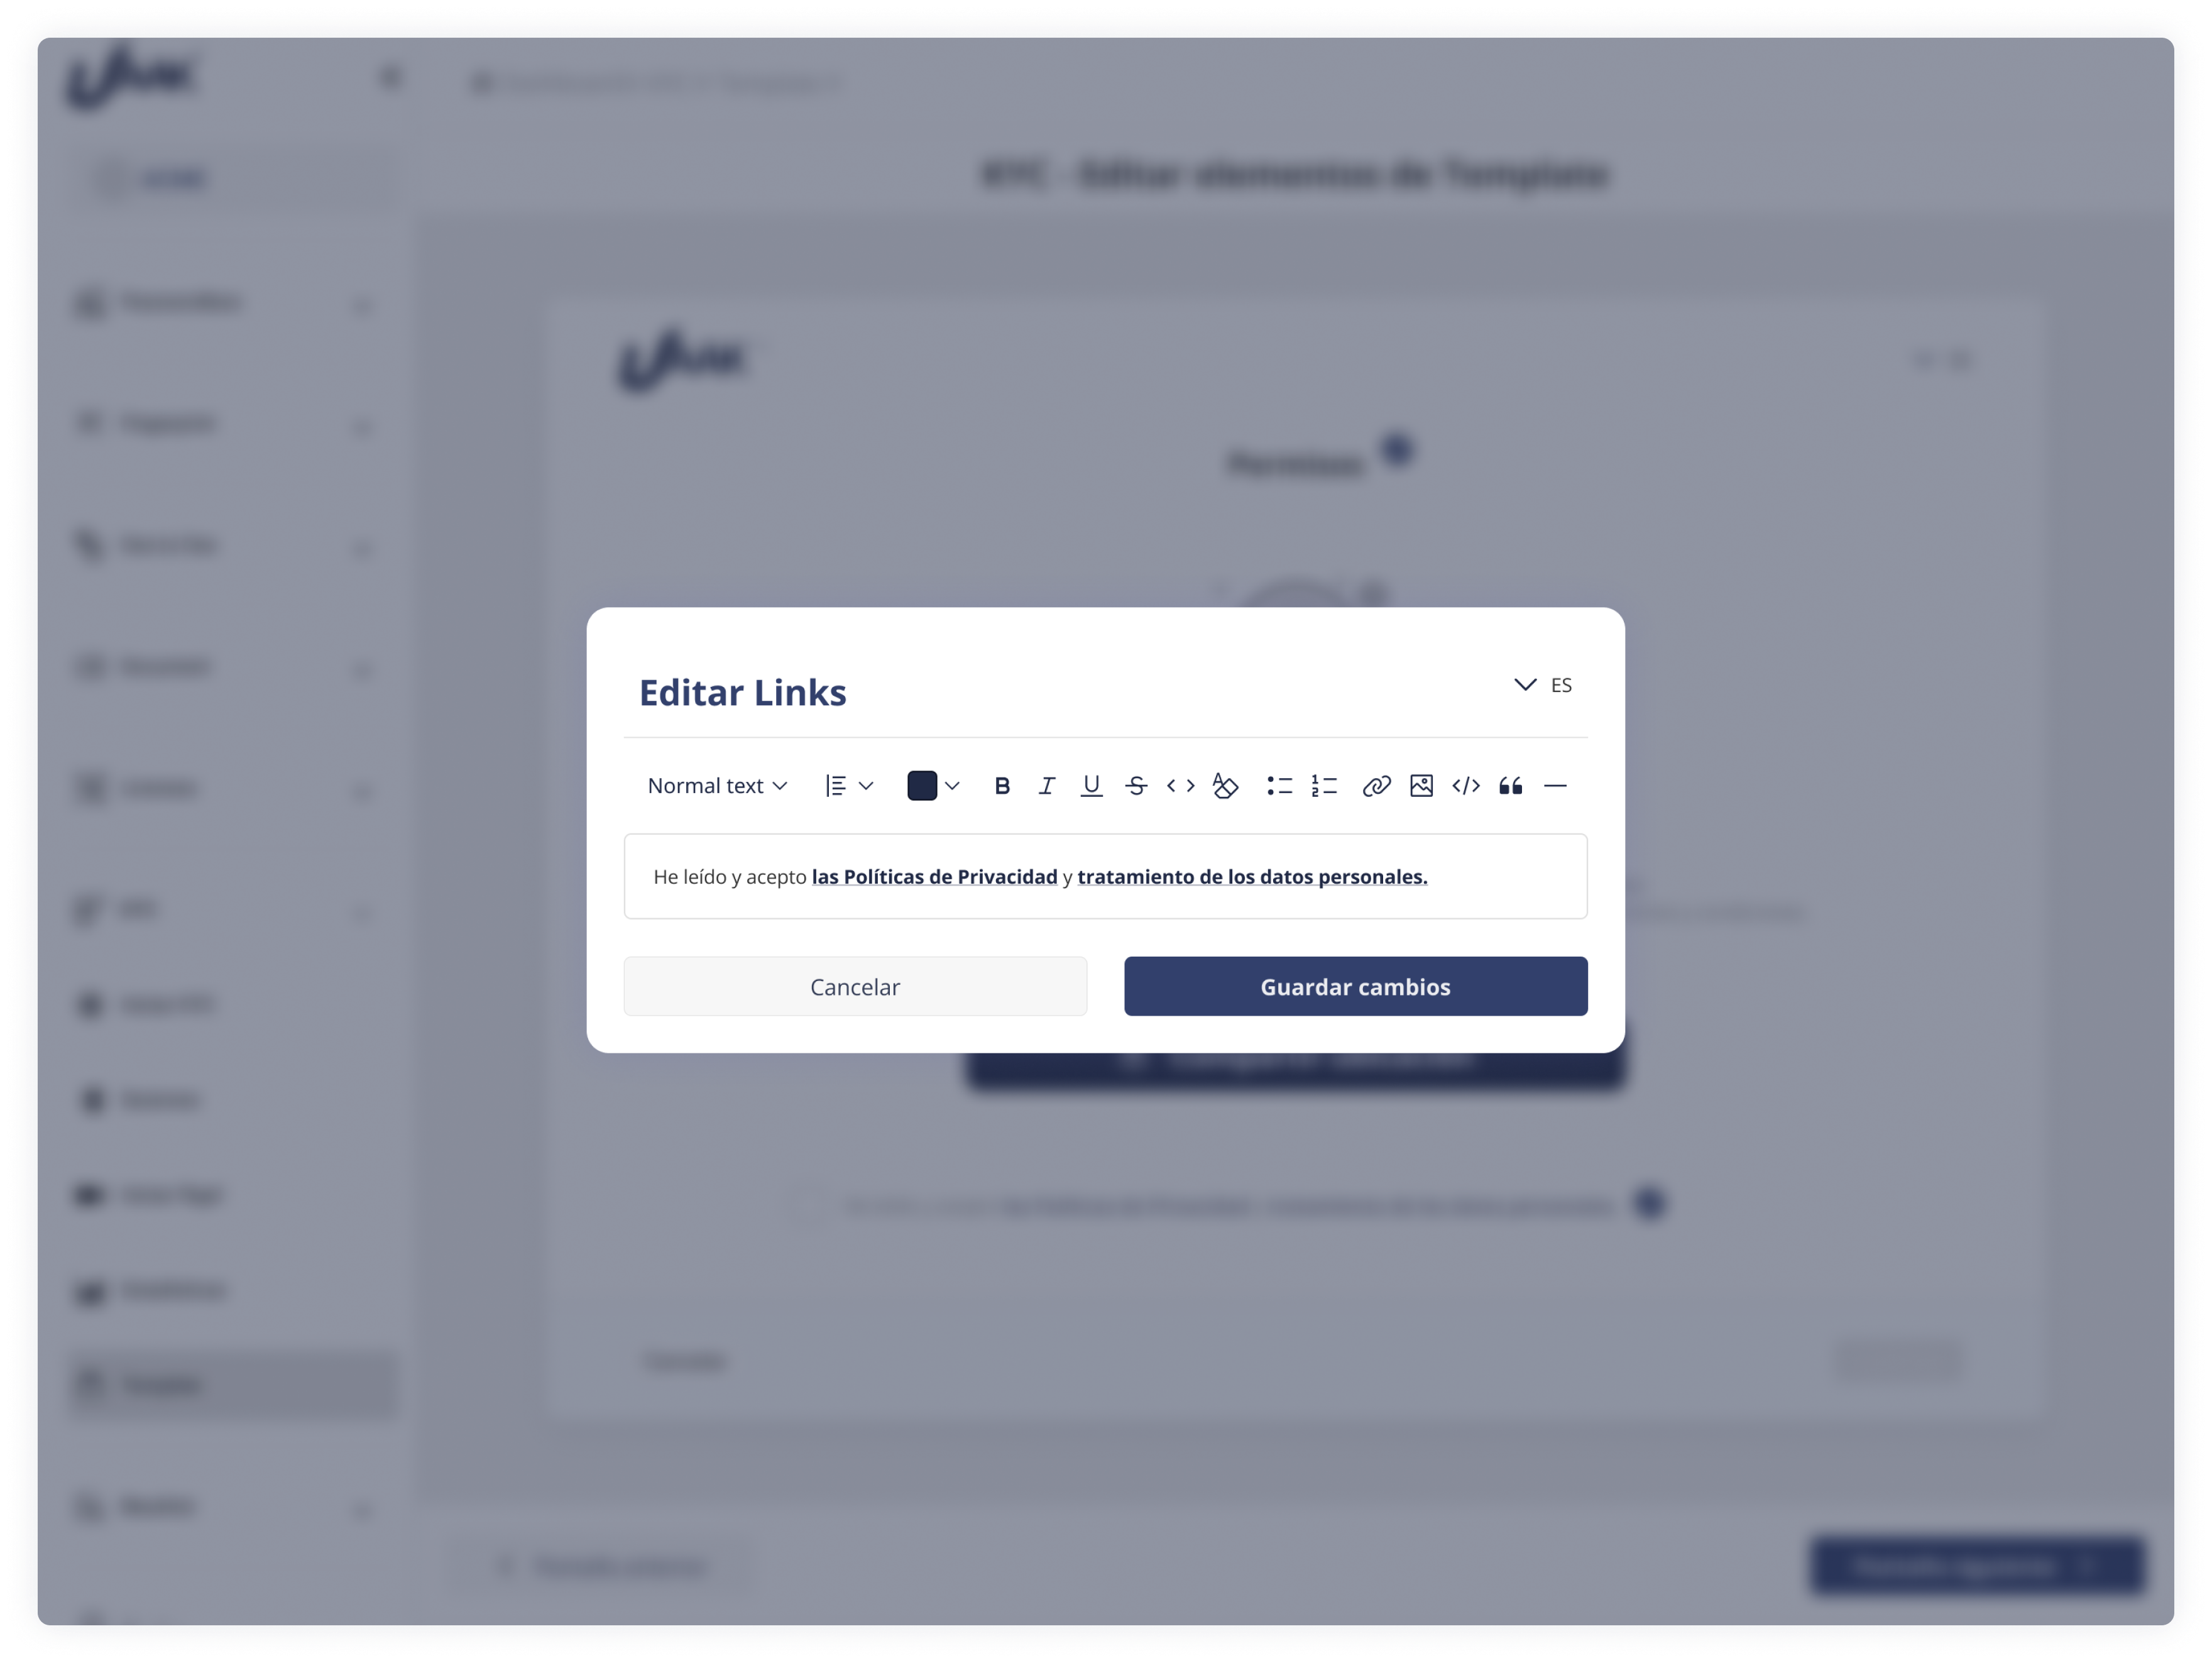
3. Display Personalization and Privacy Warning
On this screen, the user gives the necessary consent to continue. The customizable texts are also indicated with a pencil icon.
- Issuing fields:
- Paragraph applying for permits: You can edit text that explain why device permits are required.
- Policy Acceptance text: It allows to modify the legend with the check box, as "I have read and accept policies of privacy and processing of personal data."
4. Performance and Closing Display Personalization
That corresponds to the final screen that the user sees while complete the process.
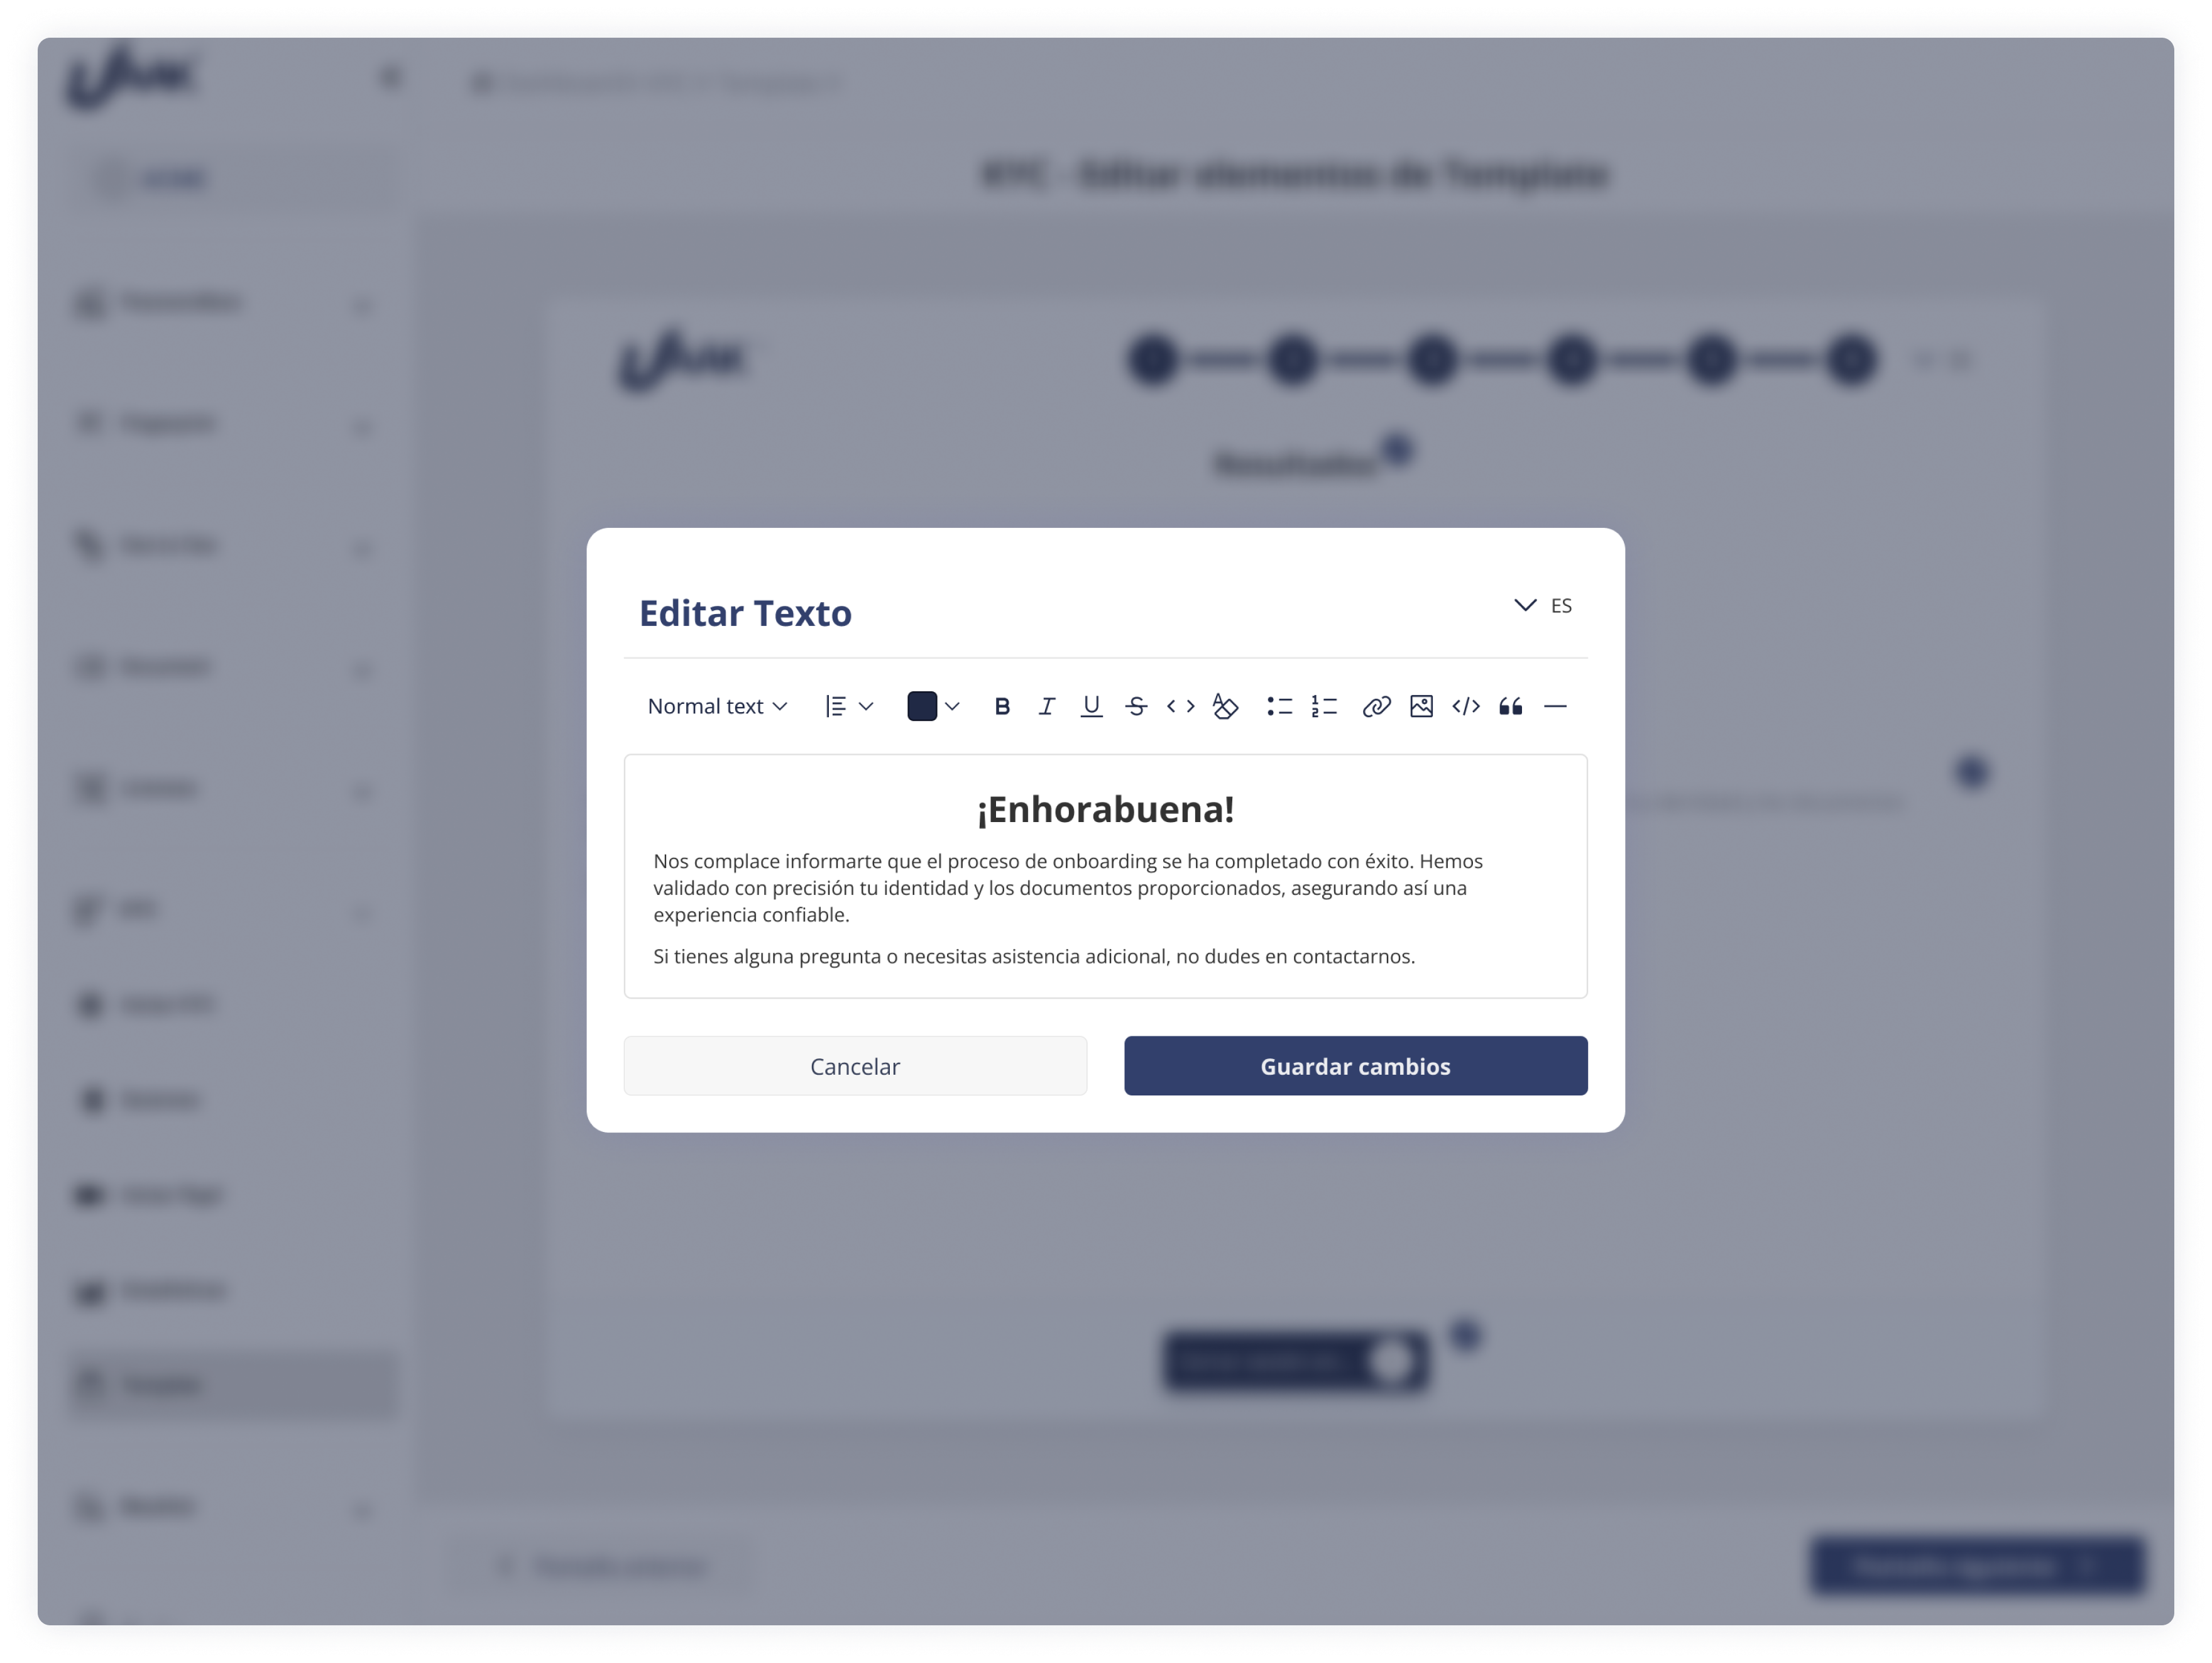
- Issuing fields: The fields marked with the Red Pencil Icon are:
- Results title: You can change the main header as "Congratulations qa tes!."
- Confirmation message: It allows to edit the paragraph that informs the user about the success of the process.
- Additional message: You can modify the support text that offers assistance, as "If you have any questions or require additional assistance, feel free to contact us."